How To Grow Potatoes Guide
Potatoes are one of the easiest and most satisfying crops to grow at home and an excellent choice for novice gardeners or getting the kids involved. With little effort you’ll be digging up fresh spuds in no time!

What to Plant and When
There’s a wide range of potato varieties available, each varying in size, shape, flavour and timing when they crop. Varieties typically fall into two groups: Early Varieties and Main Crops.
Early cropping varieties should be planted in early spring (or late winter in warmer areas).
- These varieties mature quickly (within 3-4 months) and are perfect for harvesting in time for Christmas.
- In warmer, frost-free regions, planting can begin from mid to late July.
- In most other parts of the country, wait until late August or early September when the soil has warmed and frost risk has eased.
- Early varieties to try: Illam Hardy, Cliffs Kidney, Jersey Bennes, and Marist Anchor.
Main crop potatoes are best planted in late spring or early summer.
- These varieties are normally planted from October through to March and take longer to mature but usually produce a bigger harvest.
- Main crop varieties to try: Aaron Banner, Rua, Urenika and Agria.
- Red potatoes: Try Red King and Red Rascal - these are traditional South Island varieties that prefer a colder climate.
Getting Started – Preparing your Seed Potatoes
- To get started, purchase certified seed potatoes of the variety you want to grow – these are available from most garden centres.
- Place them in a dry, light spot for 3-4 weeks to allow them to sprout (this is called "chitting"). Sprouts should be short and stubby (2–3cm). Avoid planting any with mould or overly long pale shoots.
- Don’t plant potatoes in soil where tomatoes, eggplants or capsicums have recently grown, as they share similar pests and diseases.
Preparing & Planting
Potatoes grow best in a sunny site with rich, fertile, free-draining soil. Aways rotate your planting area each year to reduce disease build-up and maintain healthy soil.
Planting in the garden:
- Prepare soil by mixing Daltons Garden Time™ Compost or Premium Garden Mix and Garden Time™ Potato Fertiliser into the soil and working it in well.
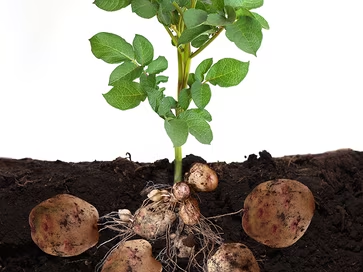
- Plant seed potatoes 5cm deep and 25–30cm apart with approximately 70cm between rows.
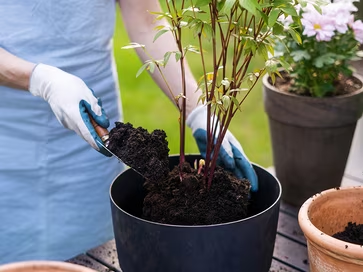
- Once plants reach around 20cm high, start ‘mounding up’ the soil around the base of the plant to 10cm high on each side.
- Continue mounding weekly or fortnightly – you can cover new shoots and lower leaves to encourage a better crop. Mounding helps warm the soil, protects against frost, and prevents greening of developing potatoes.
- Potatoes are generally ready 3–4 months after planting, depending on the variety and weather.
- Harvest once the flowering finishes and the green tops begin to turn yellow. Don’t be tempted to pull them out early!
- To check maturity, start at one end of the row with a fork and dig lightly to check the size of the potatoes. If they’re still small, leave them in a little longer.
- After tops have died back, leave potatoes in the ground for another 1-2 weeks (if the soil is dry). This helps skins to harden and store better.
- Gently brush off excess soil and store in a cool, dark, well-ventilated spot – see tips below.

Growing in Containers or Bags
Potatoes grow well in containers such as buckets, tyres, pots and even bags making them perfect for small spaces and balconies.
- Choose a deep container or bag with good drainage and place in a sunny spot.
- Add a 10-15cm layer of Daltons Vegetable Mix to the bottom.
- Place 3-4 sprouted seed potatoes on top and cover with another 10cm of mix.
- As the plants grow, keep adding more mix to cover the stems until you get close to the top – this mimic’s the ‘mounding up’ process.
- When the foliage turns yellow and dies back, your potatoes are ready to harvest. Each bag or bucket can yield 1.5–2kg of potatoes depending on conditions and variety.
Storage Tips
Store harvested potatoes in a cool, dark, well-ventilated spot. Use paper or hessian sacks and avoid plastic bags, which trap moisture and cause rot.
Feeding and Watering Potato Crops
Feed your plants with Daltons Garden Time™ Potato Fertiliser 2-3 times during the growing period. Be careful – too much fertiliser encourages leafy growth at the expense of spuds underground.
Potatoes only need watering around once a week. Increase waterings during dry spells or if growing in containers and bags but don’t over water.
Pests and Diseases
- Potatoes are fairly hardy and when planted in the right location are generally free from pests and disease.
- To keep your crops healthy, crop rotation is key. Avoid planting potatoes in the same location year after year as it can increase the risk of crops being affected by potato nematode and disease. Rotating your crops each season helps maintain healthy soil and gives your potatoes the best chance to thrive.

Glossary – Gardening Terms Explained
- Greening: Potatoes that have turned green because they have been exposed to light.
- Crop rotation: Growing crops of vegetables in different spots each year in the garden.
- Mounding up: To mound or pile up soil around the base of a plant.
- Potato Nematode: A parasitic worm that attacks root and tuber vegetables. Learn more here.