How to Grow Kumara Guide
Kumara (sweet potato) are a kiwi favourite – easy to grow, delicious to eat, and naturally rich in dietary fibre, vitamin C, beta-carotene (vitamin A), and potassium. With a little preparation and care, you will enjoying a delicious, nutritious crop in no time. Here’s how to grow kumara in your home garden.
Varieties to Grow
There are three main varieties of kumara commonly grown in New Zealand.
- Owairaka Red – the most common with red skin and creamy white flesh.
- Toka Toka Gold – golden skin and flesh, sweet and quick to cook
- Beauregard – orange skin and flesh, very sweet and great for mashing or roasting
Prime Planting Time
Kumara prefer warm soil so should typically be planted from October through till December, once the risk of frost has passed.
If planting in early spring, choose a frost-free, sunny position. In cooler areas where soil might not be warm enough, try growing them in large containers or planter bags.
Keep in mind that plants spread and take up considerate space in the garden as they grow, so allow for plenty of room!
Growing your Own Kumara Slips
You can sprout your own kumara slips at home using sand and water. They take a bit of time so make sure you plan ahead. Alternatively, you can buy kumara slips from garden centres from September / early October.
- Place your healthy kumara in a tray of moist (not wet) Daltons Propagating Sand (No. 2) or Daltons No. 1 Washed Sand and keep warm.
- Water regularly to ensure sand is kept moist. Shoots will start to appear in 2-4 weeks.
- When shoots are approximately 15cm long, gently break them off the mother kumara.
- Place shoots in a glass of water for 5-7 days until roots form.
- Now they’re ready to plant.
Planting in the Garden
Pick a sunny, sheltered sight with free-draining soil, otherwise plants won't thrive and the developing kumara may rot.
- Improve the soil and drainage by mixing in plenty of Garden Time Compost and for an added nutrient boost, Chicken and Sheep Pellets.
- Kumara do best with planted in mounds, which help warm the soil and improve drainage. Create mounds about 30cm high spaced up to 1 metre apart.
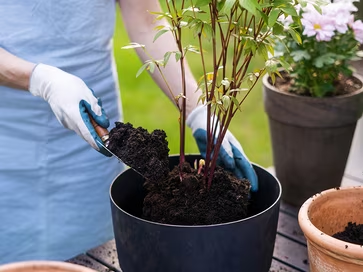
- Make a hole in each mound and bury each slip in a ‘J’ shape two-thirds into the soil.
- Water in well and mulch around the base with Daltons Premium Mulch & Grow.
Growing in Large Containers or Grow Bags
- Kumara will grow in containers, but they need plenty of room to spread.
- Always use a quality mix like Daltons Garden Time Vegetable Mix and ensure there is adequate drainage.
- Choose a pot or grow bag of at least 30–40L per plant.
- Use a quality mix like Daltons Vegetable Mix with good drainage, and place in a warm, sunny position.
- Yields may be smaller than in the garden but still rewarding.

Feeding
- Fertilise with Daltons Potato Fertiliser twice during the growing season – after planting and again 6 weeks later.
- Be careful not to over-fertilise your growing kumara plants; they have low nutrient needs, and too much fertiliser tends to produce masses of leaves and little kumara.
Watering
- Water deeply a couple of times per week.
- Boost growth by adding Garden Time Seafeed to waterings every 7-10 days.
- Avoid overwatering as this can cause rot.
General Care and Maintenance
- Throughout the growing season, gently lift some of the runners to check the kumara are developing properly away from the "mother plant".
- Mulch with Daltons Mulch and Grow to retain moisture, keep soil temperature even and suppress weeds.
- Kumara plants can take up a lot of space in a garden so ensure that there is plenty of room for them to grow.
Harvesting & Storing
Kumaras are a slow-maturing vegetable with a long growing season, typically requiring over 100 days to be ready for harvest depending on your region – so a little patience is needed.
- Around 4 months after planting, the leaves will begin to yellow and die back.
- Once this happens, carefully lift tubers using a fork or spade, taking care not to damage them.
- Cure the harvested kumara in a warm, dry place for 7 days to toughen skin and improve storage life.
- Store in a cool, dark and dry place and avoid refrigerating as this shortens storage life.
Pests and Diseases
Kumara are a hardy crop and are mostly free of pests and diseases if grown in the right conditions.
- Always watch for pests like slugs and snails in the vegetable garden and use bait as necessary.
- Practice crop rotation: if your vegetable patch has room, try rotating kumara to a different spot each year to minimise the risk of disease and soil-borne issues.

Glossary – Gardening Terms Explained
- Curing: Drying harvested crops to toughen skin and improve storage.
- Crop Rotation: Growing different crops in the same area each season to reduce pests and disease.
- Free-draining Soil: Soil that lets excess water drain away easily.
- Mulch: A layer of material on top of soil to keep in moisture and suppress weeds.
- Slips: Young shoots taken from a parent plant for replanting.
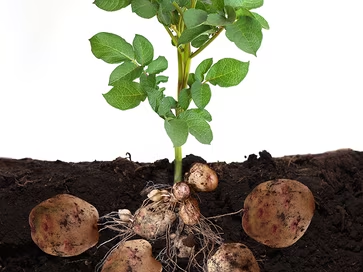
- Tubers: Swollen underground stems or roots used by plants to store food.
- Mounding: Forming raised soil ridges to improve drainage and warmth.