How To Grow From Seed Guide
Growing from seed is a very rewarding and cost-effective way to fill your garden. It is also a wonderful opportunity for children to learn by watching a tiny seed germinate and grow into a thriving plant. Whether you’re sowing vegetables, herbs, or flowers here’s how to get your seeds off to the best possible start.

Choosing Seeds for the Season
When choosing which seeds to sow, start with vegetables suited to your region and the time of year. Every variety has its season - warm-season crops like tomatoes and cucumbers need heat to grow, while cool-season crops like spinach and broccoli thrive in cooler months.
Here’s how to choose well:
- Start with what’s in season: Check our Daltons “How to Grow” vegetable guides for seasonal planting advice specific to each crop.
- Think about your climate: If you're in a cooler area, avoid heat-loving crops until the soil and air have warmed. In warmer zones, some leafy greens may bolt quickly in summer.
- Read the seed packet: It will tell you when to sow, how deep, and whether the seeds should be started indoors or directly sown outside.
- Choose varieties that suit your space: Compact or dwarf types are ideal for pots or small beds. Climbing crops like beans need support. Our friends at Kings Seeds have an amazing array of seeds to grow.
- Plan how much to grow: Don’t sow more than you have room for. It's better to stagger sowings so crops mature over time.
- Grow what you’ll eat: Start with family favourites and easy crops like lettuce, radish, spinach, or carrots.
- Save time with mixed seed packs: Many seed companies offer salad mixes or seasonal blends for variety and convenience.
- Growing flowers: If you’re keen to grow flowers from seed too, check out our “How to Grow Flowers” guide.
What to sow seeds in Indoors
Seeds can be started in almost any container that allows good drainage and holds your seed mix well. Just make sure whatever you use is clean and allows excess water to drain out easily.
- Seed trays or punnets: These are easy to use and available at most garden centres. Great for growing lots of seedlings at once.
- Cell trays or plug trays: These give each seedling its own space and make transplanting easier with less root disturbance.
- Recycled containers: Reuse small yoghurt pots, ice cream tubs or even empty takeaway trays, just punch drainage holes in the bottom first.
- Make your own pot: Egg cartons or newspaper pots are great eco-friendly options for sowing seeds. They break down naturally when planted in the garden.
- Mini greenhouses or propagators: These trap warmth and moisture to help germinate heat-loving seeds earlier in the season.
The Mix Matters
- The right mix is key to successful germination. Always use good quality seed mix like Daltons Premium Seed Mix. It supports strong, even germination and contains just enough nutrients to get seedlings off to a healthy start.
- Avoid using compost, garden soil, or regular potting mix - they’re too heavy and often too rich for young seedlings.Instead, use a fine, free-draining seed raising mix
- Always use fresh mix to avoid disease and give your seeds the best chance to thrive.

Sowing Indoors
Sowing seeds in seed trays indoors is a great way to get a head start on the season. It’s especially handy for growing varieties where you only need a few plants of such as tomatoes, capsicum, cucumber and melon.
- Fill clean seed trays ¾ full of Daltons Premium Seed Mix. Lightly dampen the mix – it should be moist but not overly wet.
- Sow seeds at the recommended depth and lightly cover with more Daltons Premium Seed Mix.
• As a rule of thumb, plant seeds at a depth of twice the size of the seed, so for example, a 1cm size seed should be planted 2cm deep.
• For tiny seeds such as lettuce or broccoli, gently sprinkle them along a row and cover lightly with more mix. - Space seed rows about 5cm apart (check your seed packet). Make sure you label and date each row so you know what you are growing.
- Once you have sown all your seed, water with a mist spray.
- Place trays in a warm, sheltered spot. To retain heat and moisture early on, you can cover them in plastic wrap over.
- Once seedlings start to emerge, remove the covering.
- Mist daily to keep the mix evenly moist – be careful not to overwater your seeds or let them dry out.
Thinning Out or Pricking Out Seedlings
- Once true leaves appear (see glossary below), only keep the healthiest-looking seedlings. Thin out weaker seedlings so the strongest ones have room to thrive.
- Start as soon as they are big enough to handle – this stops overcrowding and gives them air and room to grow.
- Use your thumb and forefinger to pull out weaker seedlings or nip them off at ground level to avoid disturbing the roots of surrounding seedlings.
Hardening Off Seedlings
- Seedlings grown indoors need to be “hardened off” before being transplanted into the garden so they get used to the outdoor temperatures.
- It’s an important step and can result in wilting or death from the sudden change of conditions.
- Do this over 10–14 days by putting trays outside in a warm, sheltered spot for an hour a day, then extending this by an extra hour every day.
- Always bring seedlings back inside each day, especially at night.

Transplanting Seedlings into the Garden
- Ensure your seedlings have been “hardened off” – see above.
- The most important step – prepare the soil for planting by mixing in plenty of Daltons Premium Garden Mix and Daltons Compost to enrich its and improve structure.
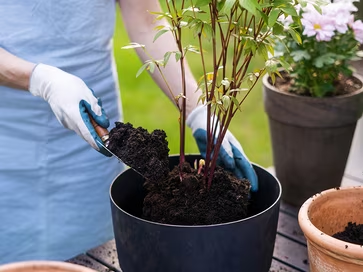
- Use a hand trowel to create a hole for each seedling – remember to check their spacing guide.
- Gently remove the seedling from the tray or pot by holding the leaves and use a pencil or similar to gently push under and up to release the roots. Try to disturb the roots as little as possible.
- Plant carefully so the young seedling is flush with the ground level then gently pat and firm the soil around the stem.
- Water seedlings in well with an added boost of Daltons Seafeed to reduce transplant shock and support early growth.
- Mulch with Daltons Premium Mulch & Feed to retain soil moisture and suppress weeds.
Direct Sowing in the Garden
Once the soil has warmed up enough, you can sow seeds such as carrots, lettuce, spinach, radish, salad greens, beans, peas and spring onions straight into the garden.
Direct sowing is often an easier way to grow your seedlings that avoids the need to transplant. However, this method is not suitable for all seed varieties so read instructions on the seed packet carefully and follow advice for planting depth and spacing.
- Prepare soil by digging through Daltons Garden Mix and Daltons Garden Time™ Compost.
- Make a furrow deep enough to allow for at least 3-5cm of Daltons Premium Seed Mix.
- Sow seeds as per the packet instructions, cover with a thin layer of Daltons Premium Seed Mix, no more than twice the thickness of the seed.
- Water gently and keep the soil consistently moist through germination – don’t allow it to dry out.
- Once seedlings have formed their true leaves (see below), thin them out (see below) as needed to allow for good air flow and healthy growth.
- Once seedlings are up and true leaves have formed, thin them to the correct spacing.
Daltons Top Tips
- Use fresh seeds as some varieties last longer than others. Check the ‘use before’ date on any seed packets.
- Make your own seed pots using recycled newspaper or re-use egg cartons. For the best germination results always use fresh mix and seeds. Daltons recommends Kings Seeds.
- Always label seed trays and garden rows – it’s easy to forget what you have planted!
- Only sow as much as you have room to grow as seedlings need space to thrive. Share any surplus seedlings or swap with neighbours or friends.
- Keep unused seeds sealed in a cool, dry place for future sowings.
Watering
It’s important to water consistently for even germination and growth but avoid overwatering as this can rot the seeds and cause damping off. This is when seedling death is caused by fungal diseases, including some root rots.
Feeding
- All the food the seed requires is contained in the actual seed and will keep it going until it forms its true leaves.
- Once true leaves appear, start feeding young seedlings every 7-10 days with Daltons Seafeed to encourage strong root and foliage development.
- As vegetable seedlings become established and begin active growth, you can feed them with a side dressing of Garden Time Vegetable Fertiliser every 3-4 weeks (depending on variety).
- For flowering plant seedlings, you can feed them with Daltons Premium Rose & Flower Fertiliser every 3-4 weeks.
Pests
Slugs and snails love juicy young seedlings! Once you have planted them in the garden, protect them with non-toxic pet and child-friendly slug/snail pellets.
There are also organic alternatives you can try, for example, beer traps, and surrounding plants with Daltons Propagation Sand (No.2), bark or sawdust.
Glossary - Gardening Terms Explained
- Germination: The sprouting of seed after a period of dormancy.
- True leaves: Seedlings sprout with two sets of leaves that almost look like clover. After a few days, a third single leaf will emerge that looks different – this is the first true leaf.
- Thinning out: Removes any surplus seedlings that have grown, to stop overcrowding and give them air and room to grow
- Leggy Seedlings: Thin, weak and elongated stems from not receiving enough light.
- Hardening off: The process of slowly exposing new seedlings to outdoor temperatures before planting them in the garden.
- Damping off: This is a term used when seedling death is caused by fungal diseases, including some root rots.